Horse Drawing Made Fun and Simple
Step by Step
This horse drawing lesson is simple and rewarding. If you can draw circles and simple lines you can draw horses. Do you remember drawing stick figures when you where little? It wasn't hard. You had fun! Guess what, drawing horses is even more fun, so grab a pencil, paper and eraser and let’s get started.
Tip: Remember to draw lightly…so you can erase easier when you need to. Also, you may want to book mark this page for easy reference to these drawing lessons.
Horse Drawing – Start with Circles for the Body

Circles number 1 and 2: Use two circles to represent the chest and rump of your horse. Make the circles the same size. If you place your circles too close together your horse won’t have space for a proper back. If they are too far apart your horse will have a long back like a ‘wiener’ dog. Place them about half a circle’s width apart.
Circles number 3 and 4: Now you are going to use a smaller circle to represent the large portion of your horse’s head. This circle will be smaller than the first two. If you make it too small your horse will have a pin head. If you make it too big your horse will be a jug head. Make it about ½ the size of your ‘body’ circles.

If you place your circle too close to the chest your horse will have a very short neck. Too far away and your horse will have a very long neck. Think about your head placement.
The last circle is going to be the horse’s muzzle, and it is smaller yet. It is about ½ the size the large head circle. Now this is not a rule. If you are doing a horse drawing of an Arabian, you may want to make the muzzle smaller. If you are drawing a large draft horse you may want to make the muzzle larger to give the appearance of a heavy work type horse.
Tip: Check out horse body parts if you don't already know them!
Horse Drawing – Let’s Add Simple Lines
Line number 1: It’s time to create the body. Draw a curved line to connect the shoulders to the rump. This is your horse’s back.

Line number 2: Draw another curved line from the top of the head to the withers (the highest point of a horses shoulder). This is the top line of your horse’s neck.
Line number 3: Draw a curved line from the bottom center of the horse’s chest toward the rump. This will give your horse a deep chest, ample belly and a flank (the area where the back leg attaches to the body).
Line number 4: Draw a curved line from the jaw to the chest. Notice that this curved line starts at the back of the jaw and comes to the center of the chest. You have just created your horse’s neck and the point of his shoulder.
Horse Drawing – Let’s Draw the Front Legs
Don’t worry this is going to be easy. First we are going to draw stick legs. We will flesh them out later.

Line number 1: Start at the bottom of the chest, just under the withers. Draw a line straight down. Make the line about ¾ as long as the chest is deep. This is the upper leg.
Small circle number 1: Draw a small circle at the base of your upper leg. This is your horse’s knee.
Line number 2: From the middle of your knee draw a short straight line down. This is the cannon bone and the lower leg.
Small circle number 2: Draw another small circle at the bottom of the cannon bone. Make it the same size as the knee. This is the fetlock joint.
Line number 3: This line is going to be very tiny. Start from the bottom middle of your fetlock and draw a short line at a 45º angle. This is your horse’s pastern (ankle)
The hoof: Draw a wompey square (yes, I made that word up) to represent the hoof.
Repeat the last 6 steps to create your horse’s other front leg. The other leg is just a little farther away, so draw it a tiny bit shorter.
Horse Drawing – Let’s Draw the Back Legs
Line number 1: Starting from the center of the rump, draw a slightly curved line going down. Notice that a horse’s back legs bends backward like a dogs back leg. This line represents your horse’s upper back leg.

Circle number 1: Draw a small circle for the hock (back leg joint). The knee joint bends forward. The hock joint bends backward. Notice the hock joint is at about the same height as the knee joint…maybe just a tad higher.
Line number 2: From the hock, draw a straight line down for the back cannon bone.
Circle number 2: Draw a small circle for the back fetlock joint.
Line number 3: This line is going to be very tiny. Start from the bottom middle of your fetlock and draw a short line at a 45º angle. This is your horse’s back pastern (ankle)
The hoof: Draw another wompey square to represent the hoof. Repeat the last 6 steps to create your horse’s other back leg. Remember it will be just a little farther away, so draw it a tiny bit shorter.
Horse Drawing – Let’s Draw the Head
Line number 1: Draw a straight line from your horse’s forehead to his muzzle.

Line number 2: Draw a line from your horse’s jaw to her chin.
The ears and eyes: Draw 2 tear drop shapes for the ears. Draw circles for the eyes and nostril. Draw a short line as shown on the horse’s face to show the fine bones above of the nostrils.
You’re almost there! You have most of your horse done. It’s time to put some muscle on those powerful legs. You have a wonderful stick figure to help guide you to the finish.
A word about horse legs, did you know that horses don’t have any muscles below the knee and hock joints? They only have bone, tendon and ligaments. That’s why their legs seem so skinny on one hand and yet powerful at the same time. They have plenty of muscle above the knees! So let’s get started…
Horse Drawing – Finishing the Front Legs
Line number 1: Draw the muscle’s of the upper front legs. Draw a line from the elbow to the back of the knee.

Line number 2: Draw a line from the bottom of the chest to the front of the knee.
Line number 3: Draw a line from the back of the knee to the back of the fetlock joint. Let the knee and fetlock ‘stick out’ a little. (I didn't, I'll have to correct that later)
Line number 4: Draw a line from the front of the knee to the front of the fetlock joint.
Line number 5: Draw a line from the front of the fetlock joint to the top front of the hoof.
Line number 6: Draw a line from the back of the fetlock joint to the back of the hoof. Repeat these steps for the other front leg. Remember portions of the other front leg will not be visible.
Horse Drawing – Finishing the Back Legs
Line number 1: Draw a curved line line from the back of the rump to the hock joint.

Line number 2: Draw a curved line from the groin to the front of the hock joint.
Line number 3: Draw a line from the back of the hock joint to the back of the fetlock.
Line number 4: Draw a line from the front of the hock joint to the front of the fetlock.
Line number 5: Draw a line from the front of the fetlock joint to the top front of the hoof.
Line number 6: Draw a line from the back of the fetlock joint to the back of the hoof. Repeat these steps for the other back leg. Remember portions of the other back leg will not be visible.
Horse Drawing – Finishing Touches
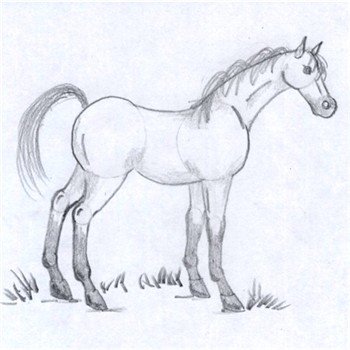
You’re almost done! It's time to erase the stick figure guidelines and add the finishing touches. You may want to use a few small lines to emphasize the knee and hock joints. If you feel like it, add a chin and lips to your horse. Add a line on the neck and rump to show muscle. Add a line to emphasize the shoulder. Give your horse a mane and tail. Add any markings that you would like your horse to have.

To keep your horse from looking like he is floating in mid air, ‘plant’ him to the ground. Add grass or shadows under the hoofs to give the impression of standing on solid ground. You’re done!
You can 'clean' your horse up better than I did mine, which will be easier if you draw lightly.
Are Your Up to This Horse Drawing Challenge?
Draw this horse again as different breeds. For a pony make the legs shorter, neck thicker, mane and tail fuller and face shorter.
For a draft horse make the body and legs thicker, hoofs larger and face slightly roman nosed with a larger muzzle.
For an Arabian make the legs long and fine with an arched neck, the face dished, the muzzle small with large nostrils and a large soft eye.
Try an Appaloosa or any breed that suits your fancy. Have fun with it.
Other Equine Topics You May Enjoy
Cost to Own a Horse

Cost to Own a Horse - Find out just how much is costs to own a horse form purchase price, to monthly expenses to incidentals. Find out what basic supplies you'll need.
5 More Horse Drawing Lessons
Fun Horse Facts
Facts About Horses - Find fun and fascinating facts about equine behavior, world records and horse history.
Let's See Your Horse Drawing!
Do you have a drawing you are especially proud of? Let your artwork be an inspiration to other horse lovers. Show it off right here!
See What Other Visitors Have Drawn
Click below to see drawings from other horse lovers...
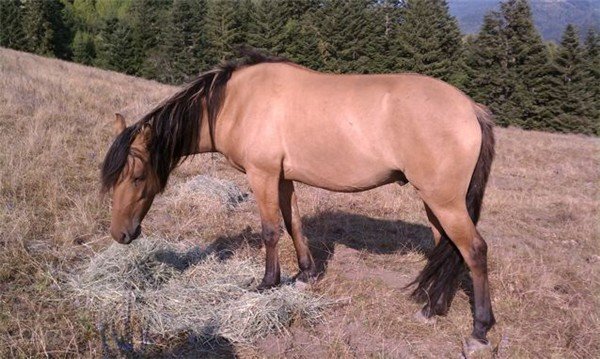
Wild Horses 
These horses were inspired by our very own.